When returning the exported output (image/PDF) as download to browser, the entire process flow looks as under:
- The chart on your web page reads the XML data and renders. This XML data contains parameters that help you configure the export parameters.
- When the user right clicks on chart and selects an export chart menu item, the chart sends the data to server (where the FusionCharts Export Handlers come into action).
- The server-side Export Handlers accept this bitmap data from chart, along with other parameters, generate the image/PDF and return it back to browser.
Let's quickly see how to configure the entire setup.
First, you'll need to copy-paste the required server-side Export Handler files from Download Package>ExportHandlers folder to your server. For this example, we've copied the PHP files to http://www.domain.com/Charts/ExportHandlers/PHP/index.php. Make sure you've copied all the files from the respective folder.
This completes the server-side setup for download routine of export. Next, we'll configure the XML for export parameters.
Our export handlers in few languages depend on some other libraries e.g., the PHP handler needs GD and GZip installed on your server. Similarly, Ruby on Rails needs RMagick and zlib to be present on your server. Make sure that you've these dependencies installed properly.
Now, you need to set the chart to allow export. This is done using:
<chart exportEnabled='1' ...>
If exportEnabled is set to 0, the chart cannot initiate export process, irrespective of the trigger.
Next, you need to set the export Handler, which is the path to server-side export handler. For our example, we've set the path as: http://www.domain.com/Charts/ExportHandlers/PHP/index.php - so the XML now looks like: <chart exportEnabled='1' exportHandler='http://www.domain.com/Charts/ExportHandlers/PHP/index.php' ...>
Now, since we intend to use server-side export, we set <chart ... exportAtClient='0' ...>
Finally, using server-side export handler, we intend to have the export file download to user's machine. So, we set: <chart exportAction='download' ...>
The final XML for this example looks as under:
<chart caption='Top 5 Sales Person' numberPrefix='$' bgColor='FFFFFF,FFFFFF' showBorder='0' exportEnabled='1'
exportHandler='http://www.domain.com/Charts/ExportHandlers/PHP/index.php' exportAtClient='0' exportAction='download' >
   <set label='Alex' value='25000'  />
   <set label='Mark' value='35000' />
   <set label='David' value='42300' />
   <set label='Graham' value='35300' />
   <set label='John' value='31300' />
</chart>
When you now run your chart and select "Save as JPEG image" from context menu, the chart will first start the capture process as shown below:
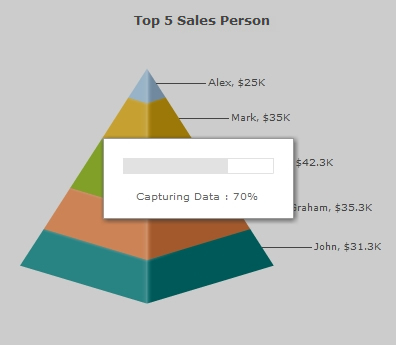
After capturing, the chart sends its data to export handler (PHP in this case), which in turn processes it and returns an output image for download as shown below:
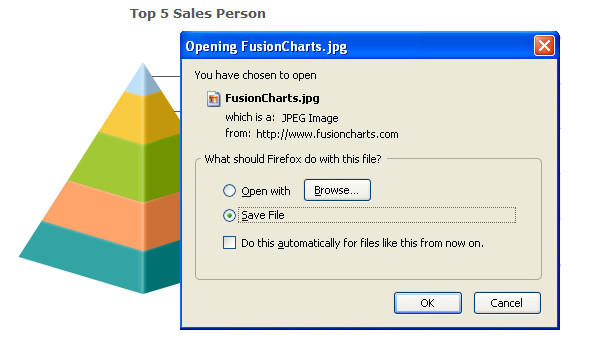
Note that in the above image the dialog says from: http://www.fusioncharts.com. When the PHP files are hosted on your server, this will reflect your domain name.
As you can see above, by default, the export chart returned the image in the same browser window. However, if you want to specify a new browser window for the exported image, you can set:
<chart ... exportTargetWindow='_blank' ...>
This will open the output image in a new browser window.
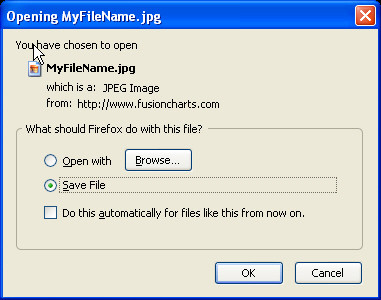
Additionally, the return file name, by default is named as FusionCharts (.jpg/,png/.pdf). You can change this by setting:
<chart ... exportFileName='MyFileName' ...>
Note that you do not have to provide the extension here, as the extension depends on the format that was selected on chart during export. This will result in:
That was all about server-side download routine.
Next, we'll see how to have these images saved on server disk, rather than download them.